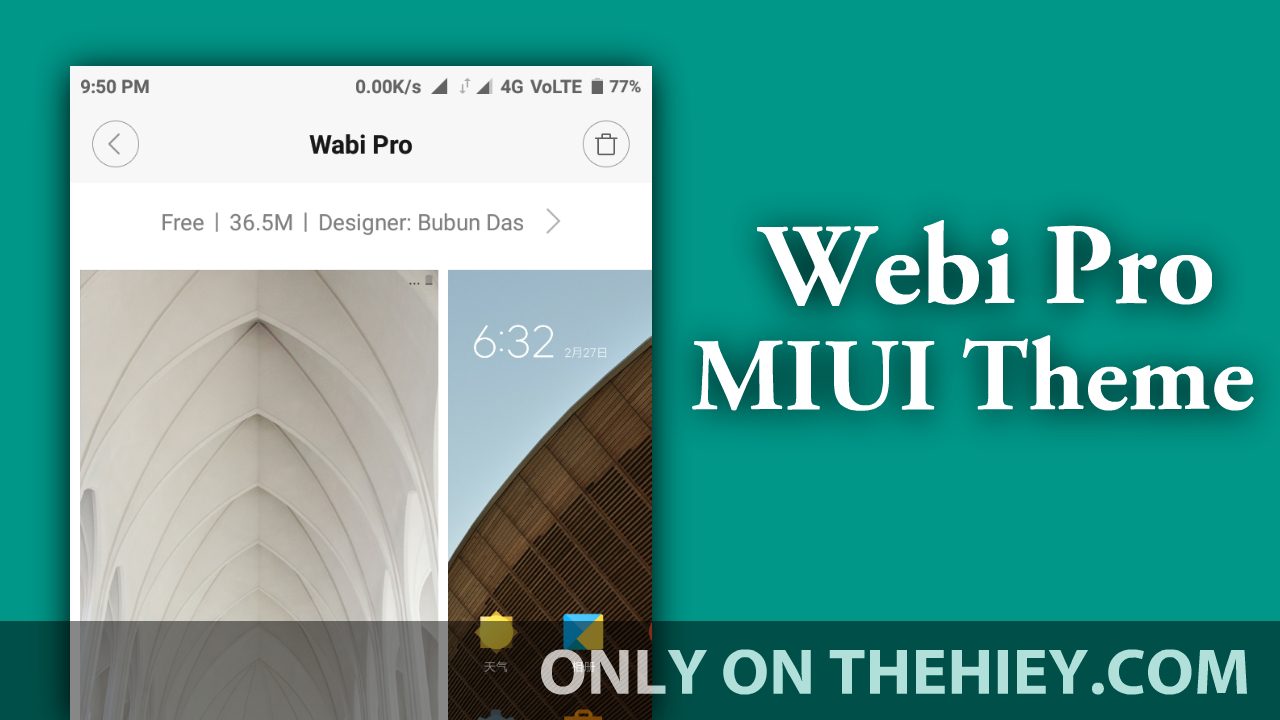
TutorialsWebsite And Server

Let’s Encrypt Implementation With Express Server Without Nginx ! (Full tutorial)

Let’s Encrypt Encrypt SSL certificate along with Express Server Without using Nginx!

Hello, Friends, Myself Bubun.

Nice to see you again! Today I’ll show how can we Use free Lets Encrypt SSL certificate along with Express Server Without using Nginx! previous night while deploying my express app to VPS server I faced some issue while setting up it, Actually, Don’t know why I no longer want to use Nginx for deploying my app everytime it is very annoying!  So I just edited my existing project a bit to do it though nodejs itself. And I fall into a problem and it took me a few minutes to figure whats wrong with it. And thought why not share it with you all? So here I am with the tutorial. Let’s Get started!

Configuring Existing App:

In this example, I’ll be using a simple express app which just prints “Hello World” When visited.

var app = require('express')();

app.get('/', (req, res) =>; {
  res.send("Hello World")
})

app.listen(80, function() {
  console.log("Server Running On http" + 80);
})

Adding Lets Encrypt Support:

For That, I’ll be using Greenlock Npm module. Click Here For More Info (NPM)

const http = require('http');
const https = require('https');
const redirectHttps = require('redirect-https')
var app = require('express')();
app.get('/', (req, res) => {
  res.send("Hello World")
})

var le = require('greenlock').create({
  server: 'staging', // Only For Testing.. Enter Url Mentioned In This Post.
  configDir: 'certs/etc', // Dir For Storing Certificats.
  approveDomains: (opts, certs, cb) => {
    if (certs) {
      opts.domains = ['example.com','www.example.com'] // Domain List For certificate
    } else {
      opts.email = 'test@gmail.com', // Put Your Email Address Here.
        opts.agreeTos = true;
    }
    cb(null, {
      options: opts,
      certs: certs
    });
  },
});


http.createServer(le.middleware(redirectHttps())).listen(80, function() {
  console.log("Server Running On http" + 80);
})

https.createServer(le.httpsOptions, le.middleware(app)).listen(443, function() {
  console.log("Server Running On https" + 443);
})

Visit your site once. It should show you an invalid certificate warning (If Everything Configured properly.)

Note: Linux And Mac Users Have to use sudo to buind the app to port 80 and 443

After You Get Certificate warning just edit the code and change the server ‘staging’ to ‘https://acme-v01.api.letsencrypt.org/directory’

var le = require('greenlock').create({
  server: 'https://acme-v01.api.letsencrypt.org/directory', //Just Like This.
  configDir: 'certs/etc', // Dir For Storing Certificats.


and Also Delete certs folder (Automatically Created During Server testing Inside project folder.)

Now visit your site. Your site should now secure with  Lets Encrypt.


Deploying The App To Server With PM2

Okay, so we have to give root access to make our app working. But we should not give root access to an app like this in production What about that?

Ans: That’s why I am writing another section in this area. Just follow me along.

We cant run bind to port 80 and 443 without running it as the root user.  Using a small program called Authbind we can allow a user to bind to ports less than 1024.

All We need to install the program and configure it.

sudo apt-get install authbind
sudo touch /etc/authbind/byport/80
sudo touch /etc/authbind/byport/443
sudo chown username /etc/authbind/byport/80
sudo chown username /etc/authbind/byport/443
sudo chmod 755 /etc/authbind/byport/80
sudo chmod 755 /etc/authbind/byport/443


Now whenever you run your app just add authbind before the code

Example:

$ authbind node app.js

Your app should work.

PM2 Setup:

install pm2 via npm

sudo npm install pm2 -g

Add a script “start” in package.json file

"start": "authbind node app.js"

It Should Look Like this:

 "scripts": {
 "test": "echo \"Error: no test specified\" && exit 1",
 "start": "authbind node app.js"
 },

Now start your app with pm2 by typing:

pm2 start npm -- start

pm2 will keep track of your app and restart it if it crashes. See More Here

And That’s Pretty much everything you need to know to do it. And if you got any issue regarding this just leave a comment, I’ll be glad to help you out. Thank you!

Related Articles

Leave a Reply

Your email address will not be published. Required fields are marked *

This site uses Akismet to reduce spam. Learn how your comment data is processed.

Check Also

Close
Close

Adblock Detected

Please consider supporting us by disabling your ad blocker